

Sending an email from an order
When you are already looking at an order, you can email its customer without going back to the list. This article covers the Custom Email box on the order screen and the history it keeps.
The Custom Email box
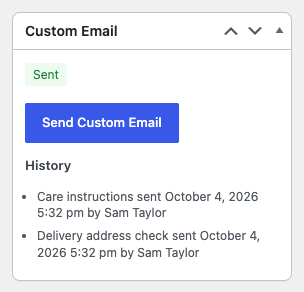
Open any order from WooCommerce → Orders. The Custom Email box sits in the right-hand column of the order screen, below Order actions, and shows:
- Sent or Not sent, the same as the column on the Orders list.
- A Send Custom Email button.
- A History list, once at least one email has been sent for this order.
Send an email
- Click Send Custom Email.
- In the window that opens, check the address after To: and choose a template.
- Click Send Email.
The window shows “Email sent.” and closes, and the box changes to Sent. The email went to the billing email address on the order. The window works the same way as on the Orders list, described in Sending an email from the Orders list.
The history
Each email sent for the order adds a line under History, newest first, such as “Delivery address check sent September 30, 2026 10:15 am by Alex Smith”: the template name, when it was sent, and the staff member who sent it. Dates and times follow your site’s date and time format. The new line appears the next time the order screen loads.
Every send also adds a private order note, for example: Custom email “Delivery address check” sent to customer. Private notes are for your staff; the customer does not see them.
The history keeps the template name as it was at the time, so renaming or deleting a template later does not change it.